6 Helpful Tips To Use When Teaching Blends + FREEBIE
Teaching blends can be tricky, but when it comes to small group guided reading instruction, we have the perfect opportunity to target our instruction to the specific needs of our students!
Some students catch on quickly to blending consonant sounds and those students should continue to practice blends in text, but move on to their next reading goal. Other students, especially those with speech disabilities, struggle with blending consonants and these 6 teaching blends tips are great for these students! As you keep reading you’ll find out how to add more repetition as well as different institutional presentations to have successful, confident readers.
Pull out your toolbox of interventions and find some helpful tips for teaching blends for your students who need more!
When it comes to blending consonant sounds, it’s best to have several instructional strategies to pull out. There are many out there, but these are the strategies I have found to work the best for my students and are the easiest to implement. I LOVE easy!

Sound Boxes Taped to the Table
The first tip for teaching blends is taped sound boxes. This activity is short and sweet but can be very powerful for those students who need more practice with hearing/saying the phonemes in a word.
Get out 4 sticky notes to start and add more as your students progress with blends. Once the sticky notes are taped down, all you need is your finger and the student’s attention. Make sure they are looking at the boxes, not you.
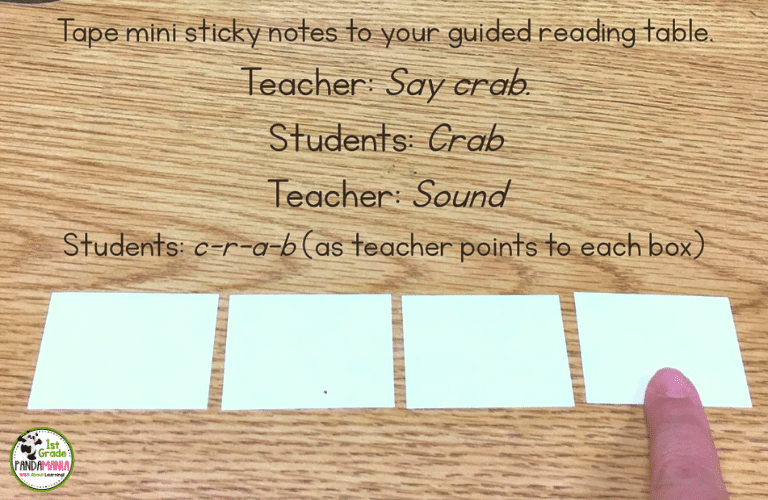
Teacher: Say crab. (teacher sweeps across or under boxes)
Students: Crab (teacher sweeps finger across or under boxes)
Teacher: Sound
Students: c-r-a-b (teacher points to each box for each sound)
At this point, some students will combine cr for the first sound. They must distinguish the sounds as separate, but be able to blend them together. If this happens, model with the following:
Teacher: My turn. c-r-a-b (teacher models pointing to each box for each sound) Your turn. Say crab. (repeat above until students can say each sound for each box.)
After a few days of this activity with various words, when students are proficient with sound-by-sound blending orally, they move on to identifying individual sounds in the word.
After saying the sounds in the word (above), the teacher then points to the first box and says:
Teacher: First sound?
Students: /c/
Teacher: Last sound? (pointing to last box)
Students: /b/
After a few days of practicing initial and ending sounds, move on to second and middle sounds. Scaffold this activity so you are working at their level for several days for only 1-2 minutes tops each day and build upon the activity until they can easily identify individual sounds. Then add boxes as needed to work on longer words with blends.

Use Speed Drills Daily
Depending on the skill the group is working on, I use speed drills daily for only 1-3 minutes.
Students whisper read each line of sounds or words as I quickly listen to each individual, giving feedback as necessary. Since this is a daily routine, students quickly start reading, I listen, and then we move on to the next activity. Every week I pull out new drills that specifically target each group’s goals. In order to save precious instruction time, have them ready to go in that group’s bin.
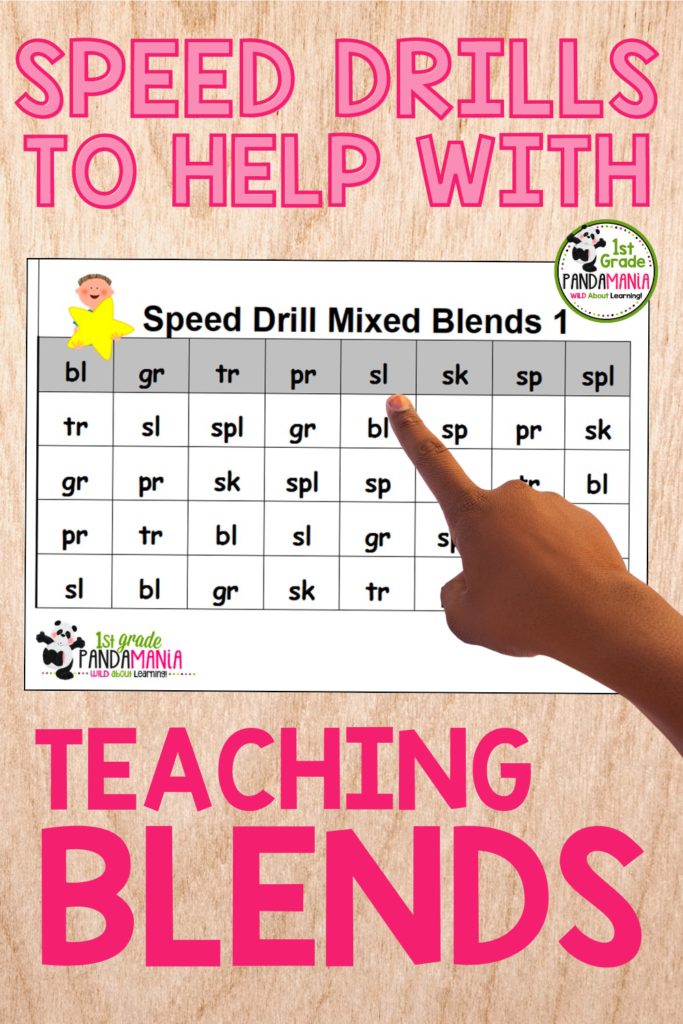
Grab these Speed Drills for Blends and Digraphs to help with blends and find all of my drills for various skills including sight words HERE.

Using Magnetic Letters to Build Words
I like to use magnetic letters because they are fun, as well as quick and easy for students to put back into place. And BONUS… they are very effective for teaching blends. I first saw this strategy used years ago in a Jan Richardson demonstration and modified it to fit my instructional needs.
Tip: I display a giving tree at open house and magnetic letters are one of my requests.
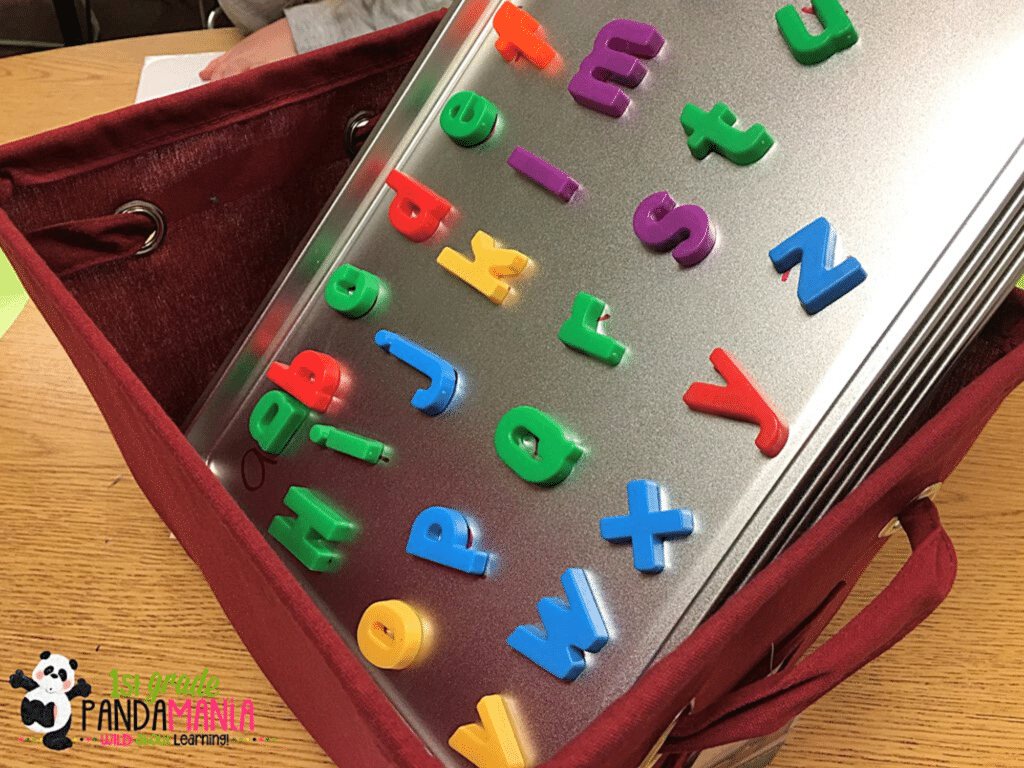
First I purchased 6 small cookie sheets at Walmart for 88 cents each. Seriously. 88 cents. They are small enough to be placed in front of each student in a small group or at a center. Next, I used a Sharpie to mark where each letter goes so students can quickly put the letters back.
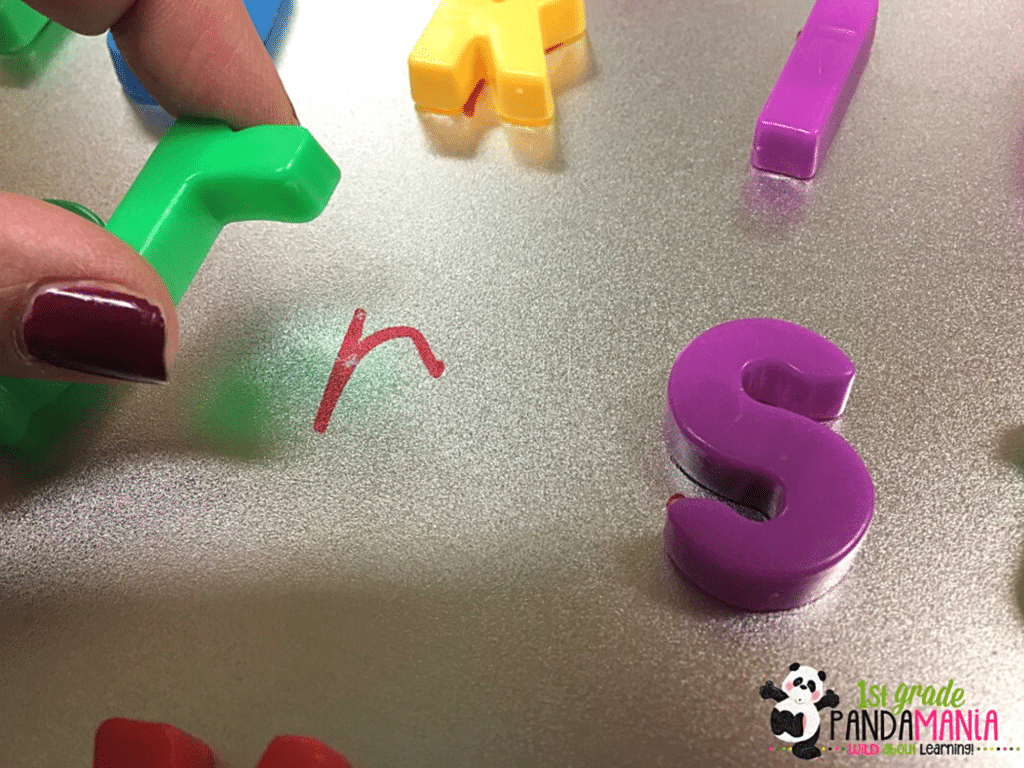
I place them in a basket with other guided reading tools I use for the week (Expo markers, old socks for erasing, sight word cards, etc.) I say a word, they quickly build it. I tell them to mix it up and build it again.
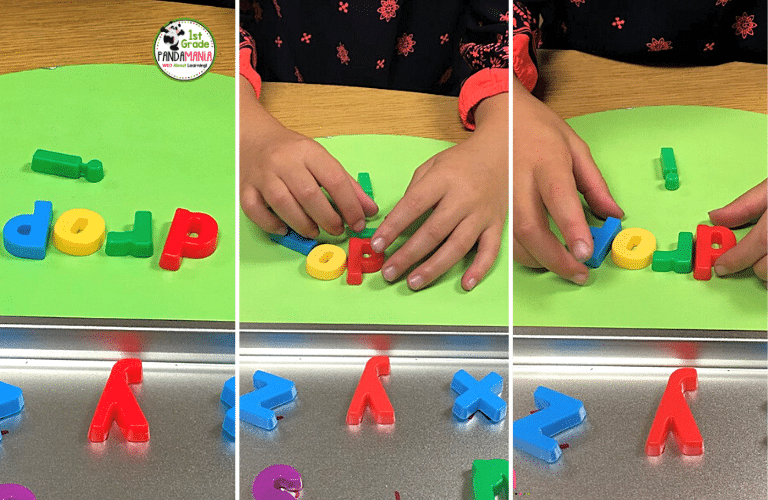
We repeat this process 2-3 times with different words and it takes 2-3 minutes from start to finish. It works because it is a daily routine that students learn to anticipate and know quickly what to do, taking very little time. Words can be built right on the table. The metal pan is only used for keeping the letters in ABC order for storage.
Watch this video to see how we do it!

Roll and Read Blends Center
Once I feel my students can attack those blends more independently or with a partner, I include Roll and Read Beginning Blends Activities in their centers. I don’t use these during instruction since this is a game for fluency practice. I reserve my guided reading time for activities that require guidance from me.
These stay as a May Do activity for a week and then I change them out each week. (See my Must Do, May Do blog HERE.)
See other Roll and Read Activities HERE.

Word Family Flip Books Center
This center is one my favorite ways for teaching blends! My students love making these Word Family Flip Books and they can read the words over and over. There is practice with short and long vowels and various blends.
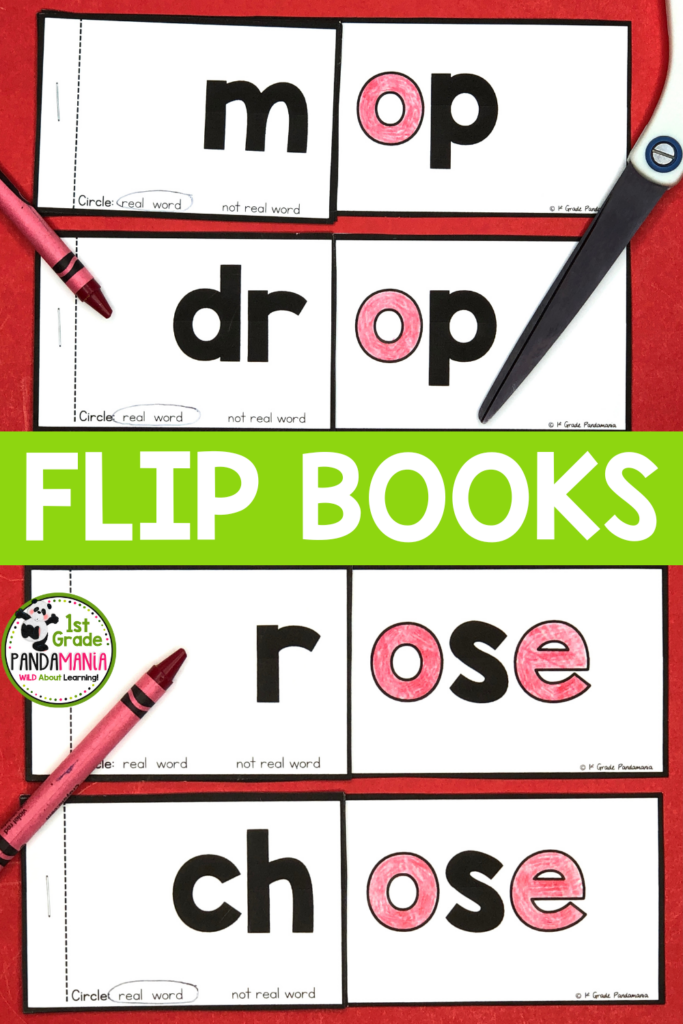
First, they cut up each part and then staple them into small books with one staple. Then they read each word and determine whether it is a real word or not a real word. This forces them to carefully read each word. Easy Peasy!
- Long o Word Family Phonics Flip Books
- Short o Word Family Phonics Flip Books
- ALL Short and Long Vowel Word Family Flip Books
Consonant Cluster Pocket Chart Center
The last tip for teaching blends is these pocket chart centers. These centers are one of my students’ favorite centers. I change it out weekly depending on their skill level. With this center, students simply organize the words under the correct blend.
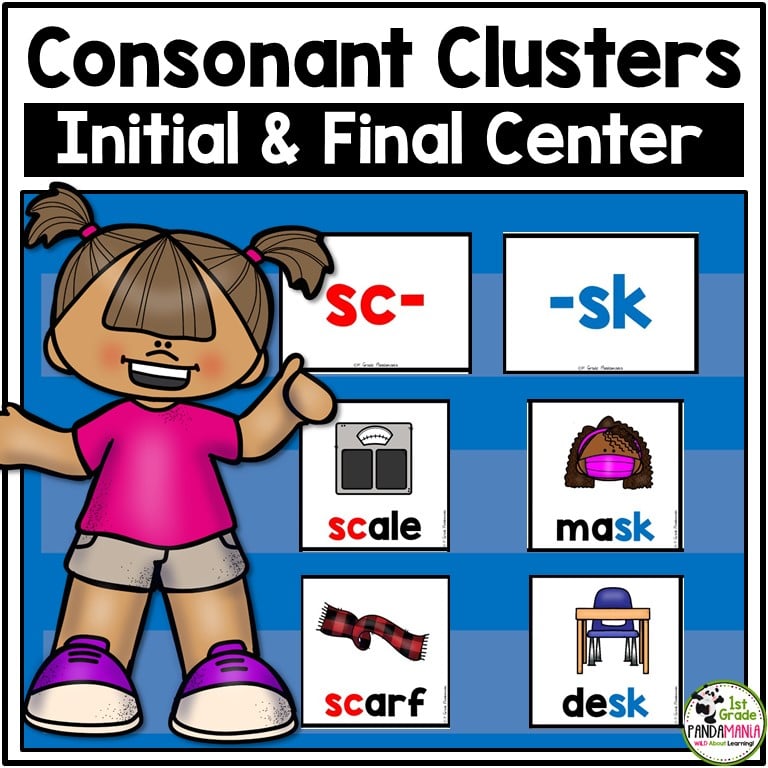
Super easy and they work so well with a partner to complete this center activity. Then they must read each word in each column. I really LOVE this activity for teaching blends!
See all my Pocket Chart Centers HERE.
I hope these 6 tips for teaching blends will help you as much as they’ve helped me! If you have any questions or ideas please comment below.
Thanks for stopping by!
-
Product on saleHMH Into Reading Sight Words and Spelling Homework 1st Grade 2020Original price was: $4.00.$2.00Current price is: $2.00.
-
Product on saleChristmas Activities for the Classroom BIG Bundle (1st and 2nd Grades)Original price was: $18.45.$12.91Current price is: $12.91.
-
Product on saleHMH Into Reading Spelling, Sight Words, Vocabulary BUNDLEOriginal price was: $62.20.$49.95Current price is: $49.95.
-
Product on saleHMH Into Reading Challenge and Regular Spelling Lists BUNDLE 1st Gr. 2020Original price was: $7.00.$5.60Current price is: $5.60.
-
Product on saleLong Vowel Worksheets Phonics Activities BUNDLEOriginal price was: $17.00.$15.00Current price is: $15.00.
-
Product on saleShort Vowel Worksheets Phonics Activities BUNDLEOriginal price was: $24.00.$19.95Current price is: $19.95.
-
Product on saleFluency and Comprehension Passages with Long and Short Vowels BUNDLEOriginal price was: $9.00.$7.50Current price is: $7.50.
-
Product on saleGuided Reading Lesson Plan Template and Resources K-2 Fillable FormsOriginal price was: $30.00.$10.95Current price is: $10.95.




I really like your idea of writing with a sharpie where the letters go with the cookie sheets and magnetic letters. That's an awesome idea I'd be using if I still taught reading or first grade. It's digital literacy this year. Thank you for all of the useful strategies! Jan Richardson has awesome ideas. Especially her book – The Next Steps in Guided Reading.